There is no lack of CDN providers available for ensuring that the static content of your website is delivered. A good number of them offer very competitive prices per GB of traffic. However, this low pricing is typically paired with a relatively high minimum payment, which must be met monthly or annually depending on the provider.
The case described above is ideal if your needs exceed the bandwidth that is covered by the minimum payment (in general the price/GB decreases the more bandwidth you consume).
If we are expecting relatively low traffic but would still like to make use of a CDN, the more cost effective approach would be to find a provider that offers pay-as-you-go billing. Two major candidates that meet this criterion are Amazon CloudFront and Microsoft Azure. Since I already had an Azure account from some previous tinkering with web apps, I opted to go the Microsoft route. The steps are documented below:
Create a CDN profile
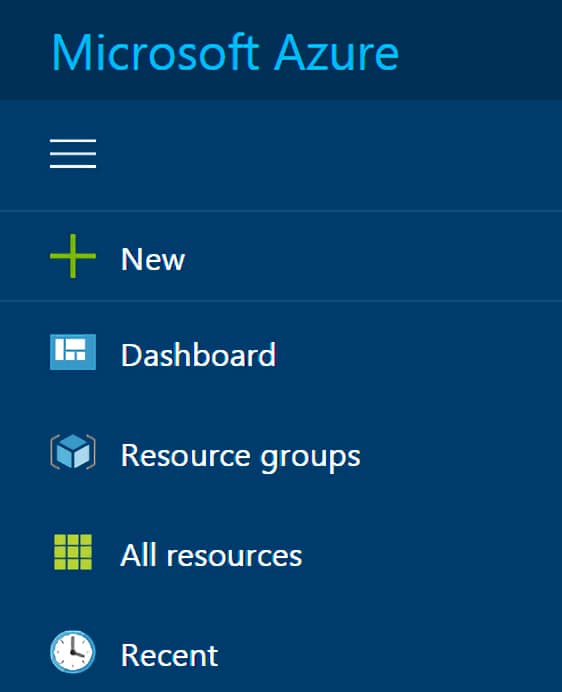
Assuming you have created an Azure account, sign in to your Azure portal.
On the navigation pane on the left of the portal, click through the following options: New → Web + Mobile → CDN. This will open up a pane for setting up your CDN profile.
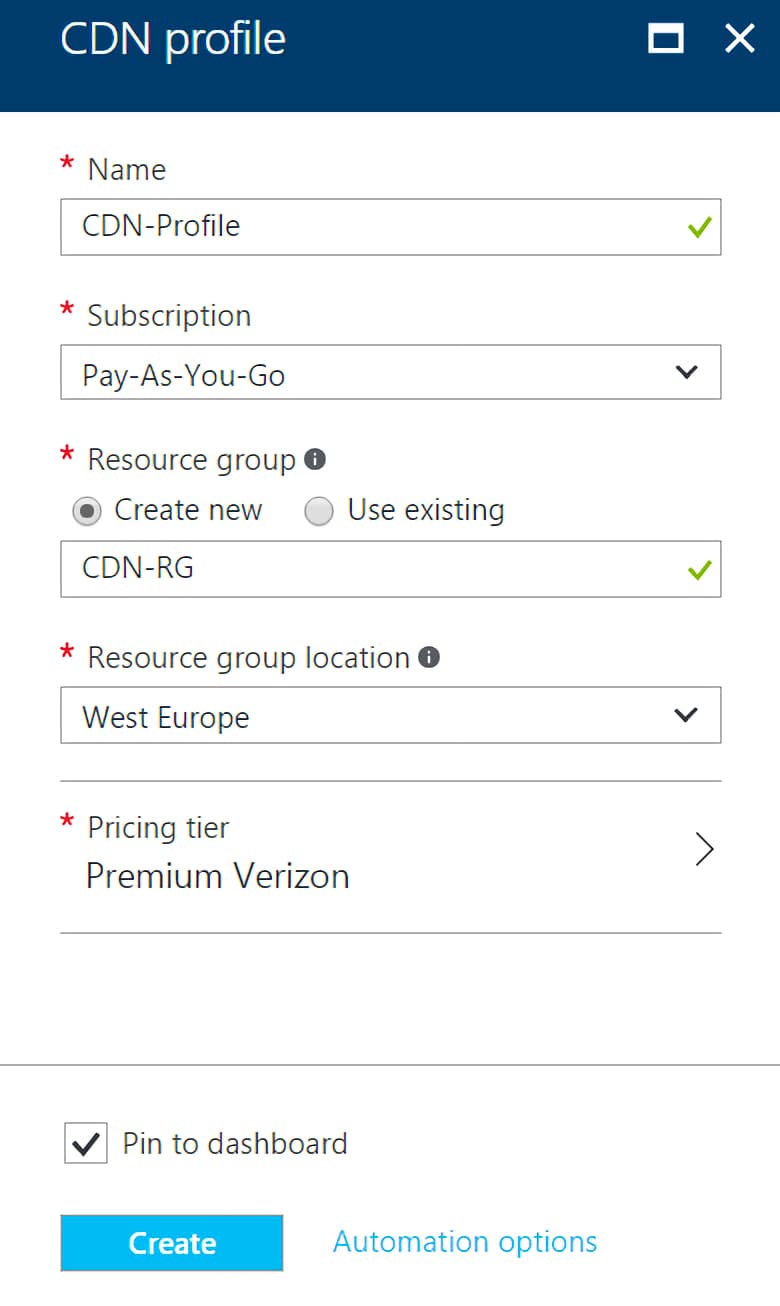
Give your CDN profile a Name. Create a new Resource Group and provide a name for it. The tooltip next to the Resource group location explains that the region you select has no impact on the availability of your resources on the network, so pick whichever you prefer.
The Pricing tier will depend on what your requirements are (see the features comparison table). Pick one of the Verizon pricing tiers if you want support for custom domains with HTTPS.
Check the Pin to dashboard checkbox to make it easy to find our CDN profile later. Click on Create to create the CDN profile.
Implement Azure Storage
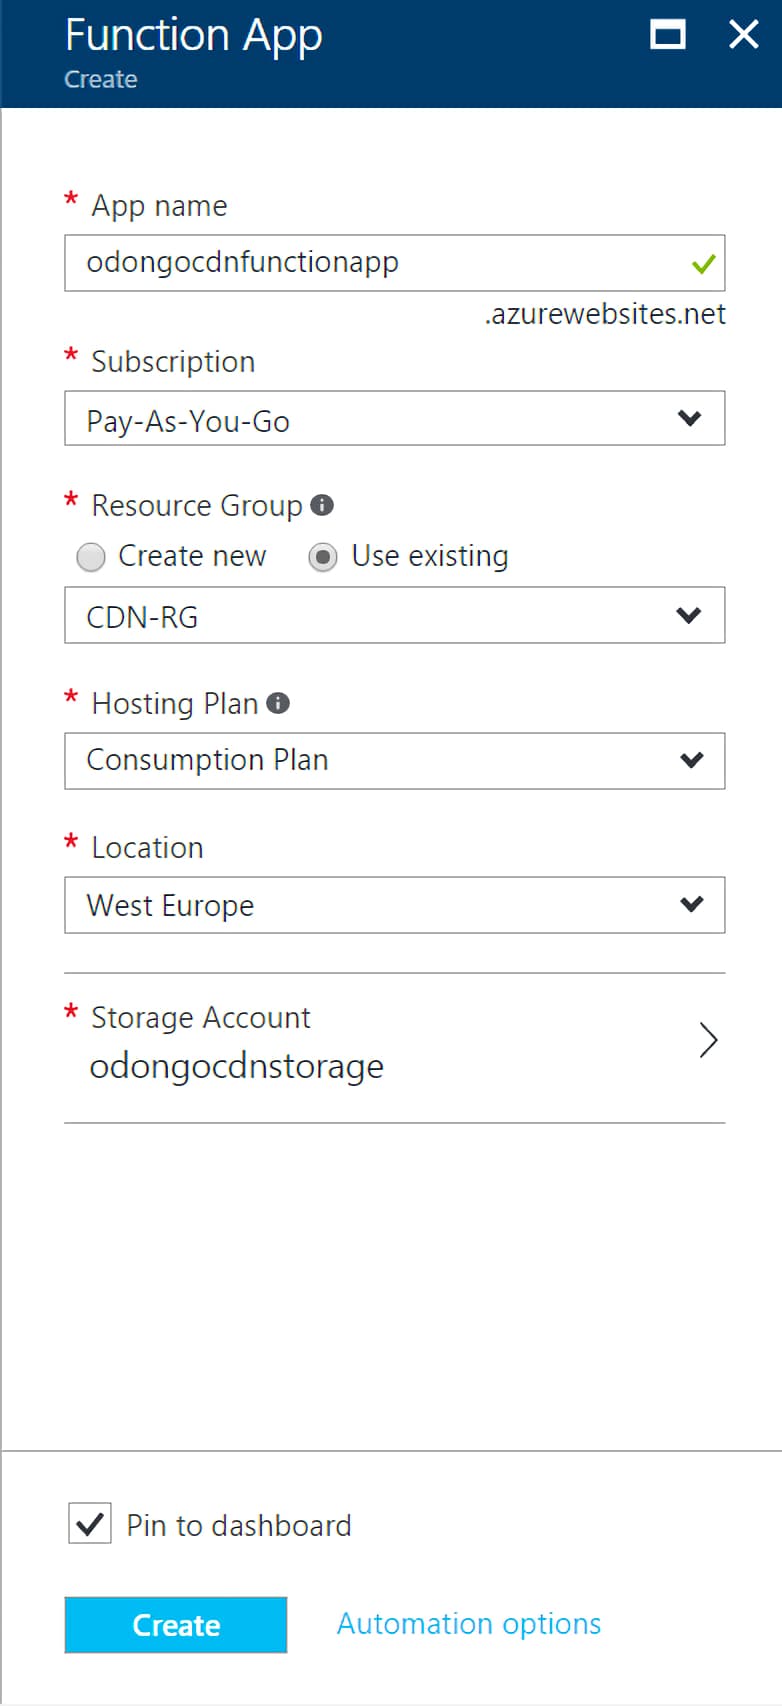
Create a function app by navigating to the setup pane from the navigation pane: New → Compute → Function App.
You may use an existing resource group. You also have the choice to rename the storage account by clicking on Storage account → Create New.
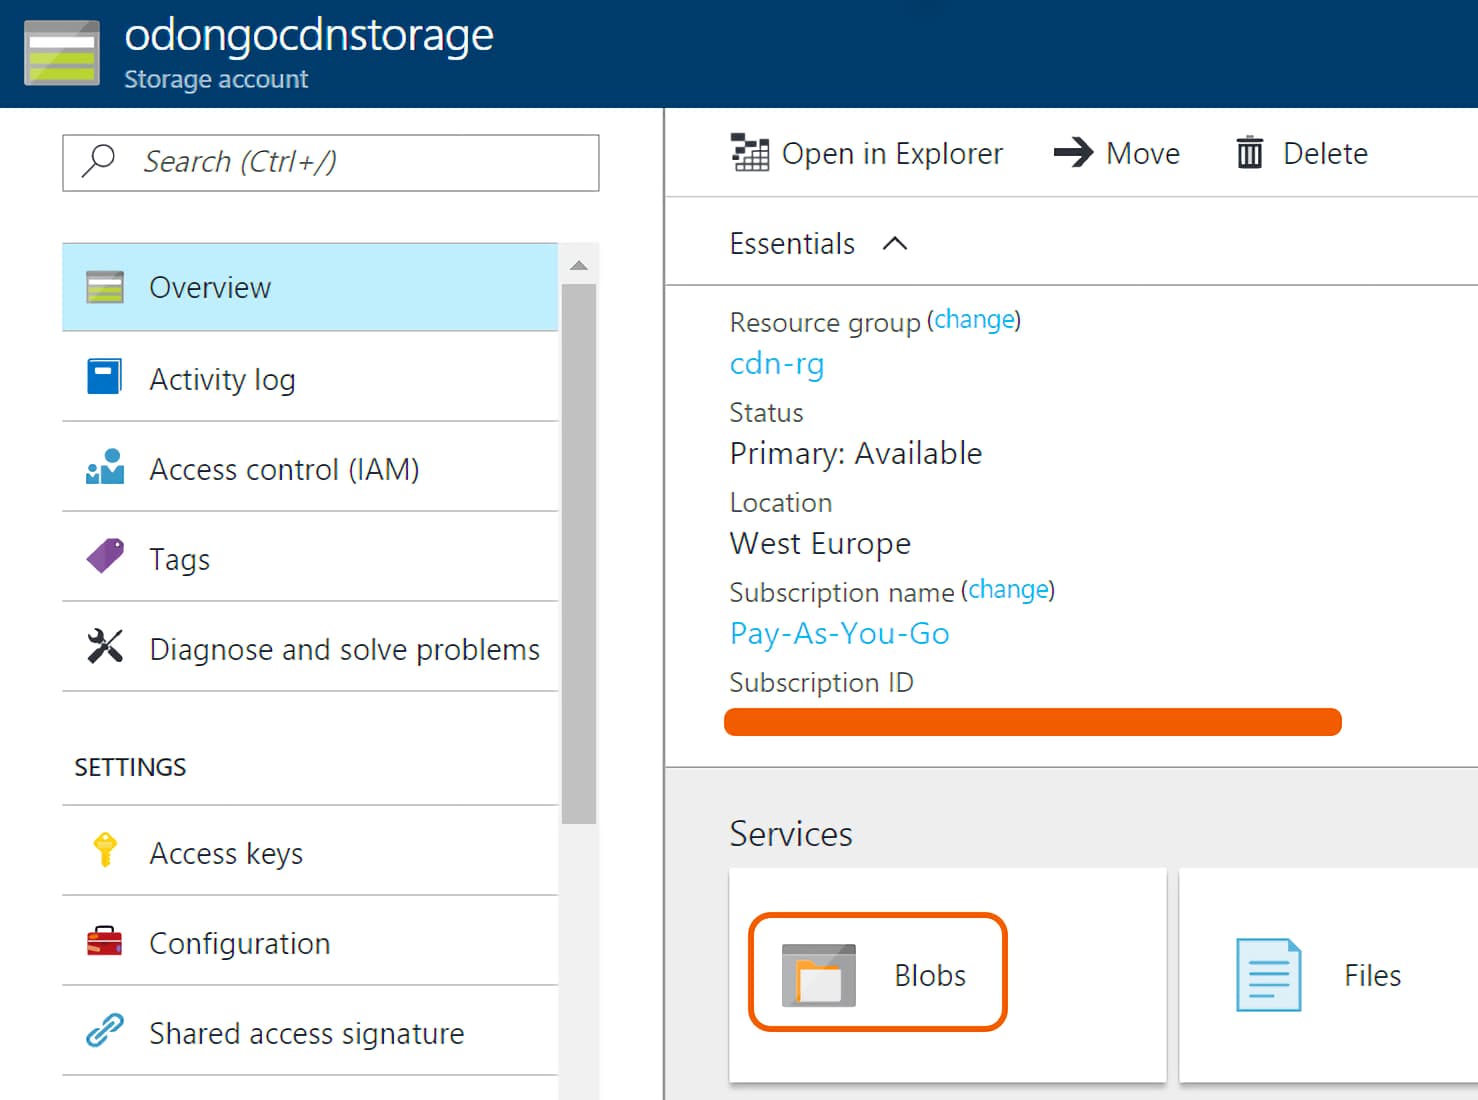
To keep your resources organised, it is a good idea to create folders for different resources, e.g., a fonts folder for web fonts or an images folder for images. Click on All resources on the navigation pane and open up the storage account that you just created. Click on Blobs → + Container and after naming the container, set the Access type to Blob.

To upload a file to a container, click on the container name and then on Upload. This allows you to select local files for upload (see Microsoft Azure Storage Explorer for managing Azure storage outside of the web portal). But before you start uploading files...
Write cache header functions
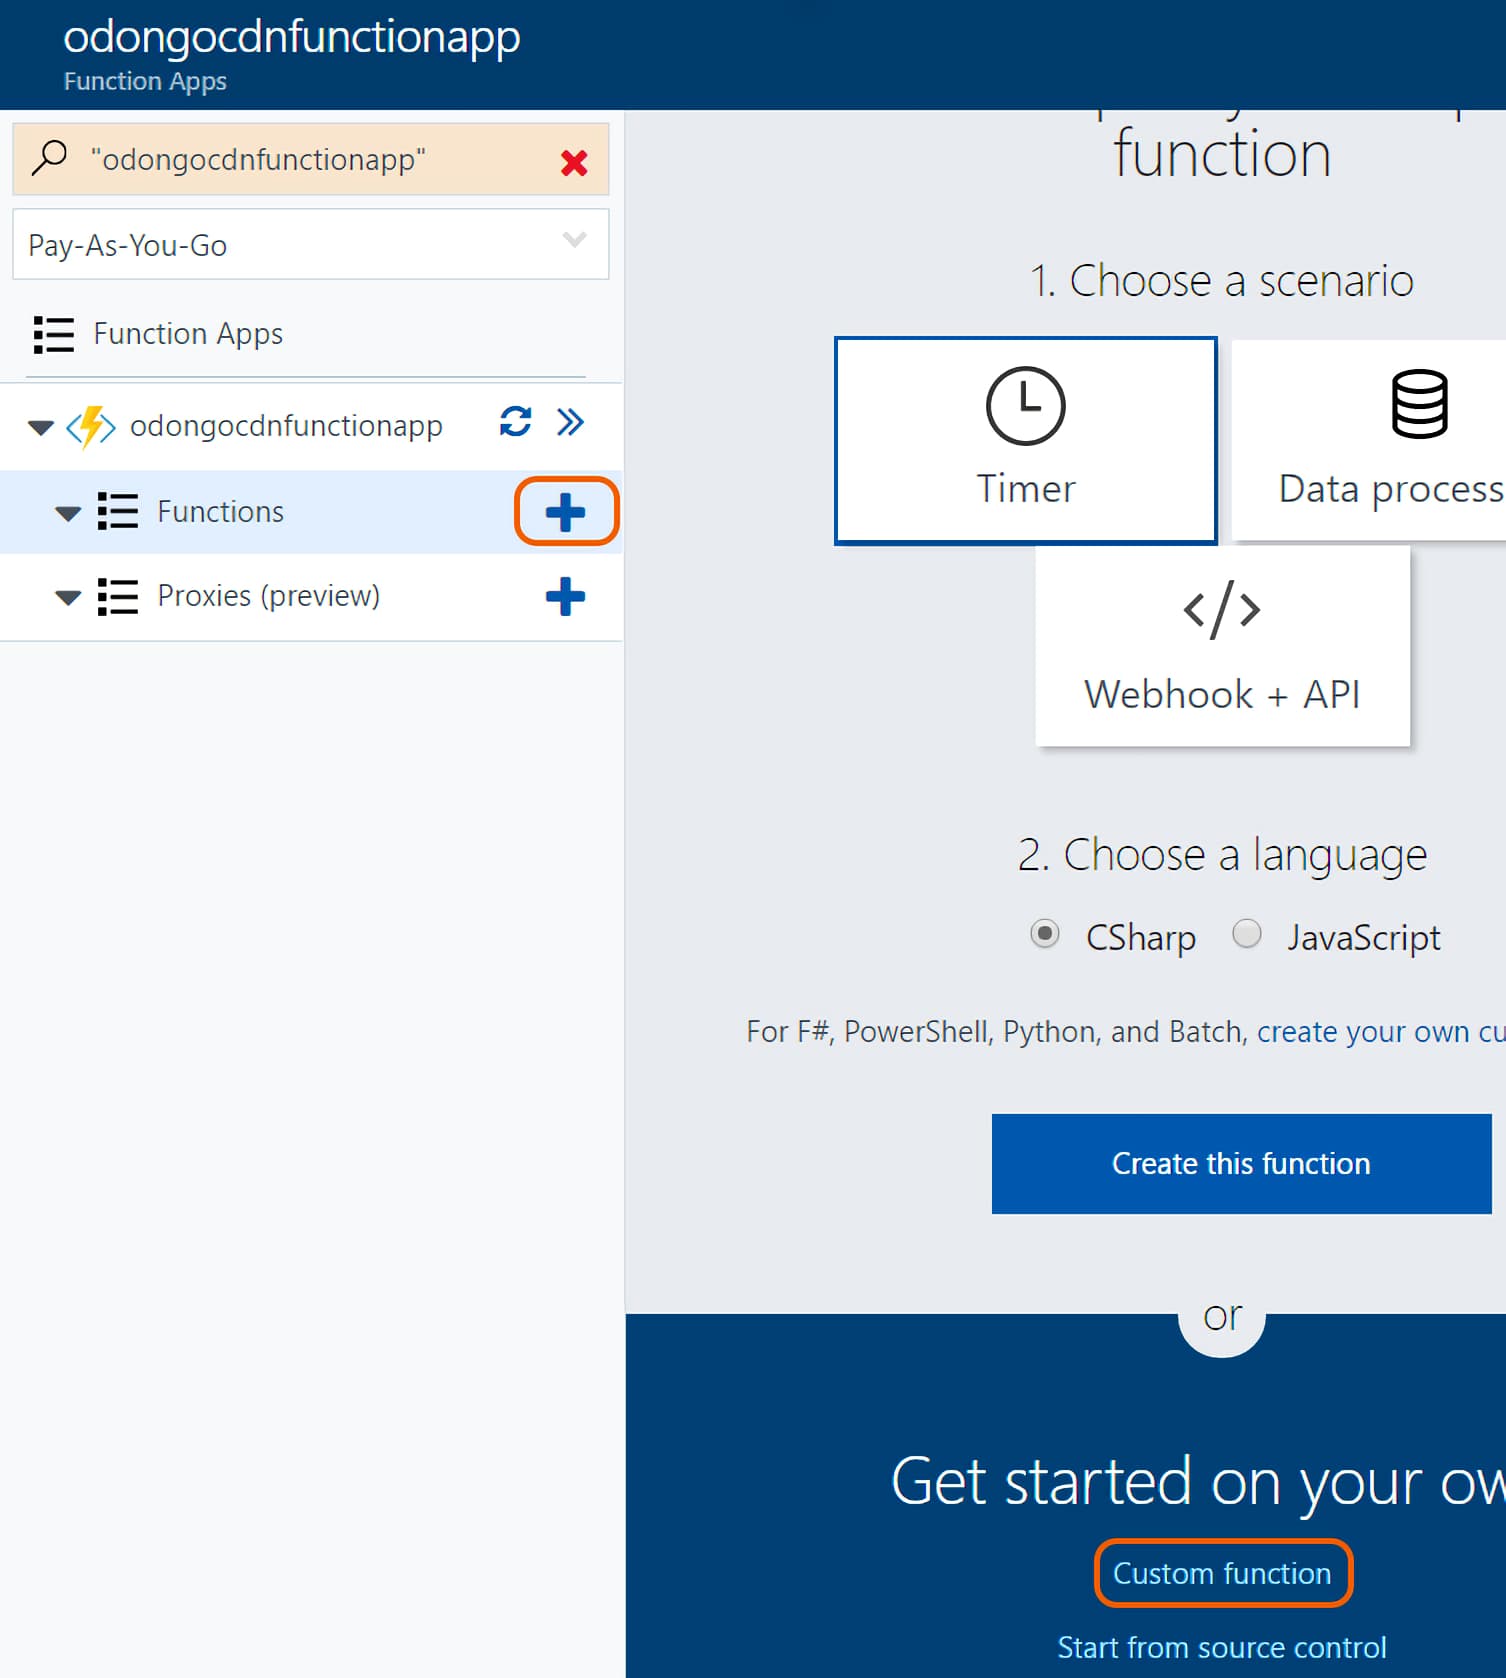
Open up the function app that was created in the previous step (under the All resources tab in the navigation pane it has the type App Service).
Click on the + sign next to Functions and then on Custom function → BlobTrigger-CSharp.
Name your function. For the Path, enter the container name followed by /name (if you have a container called images in your storage account, then the path should be images/name).
Under Storage account connection, click on new and choose the storage account.
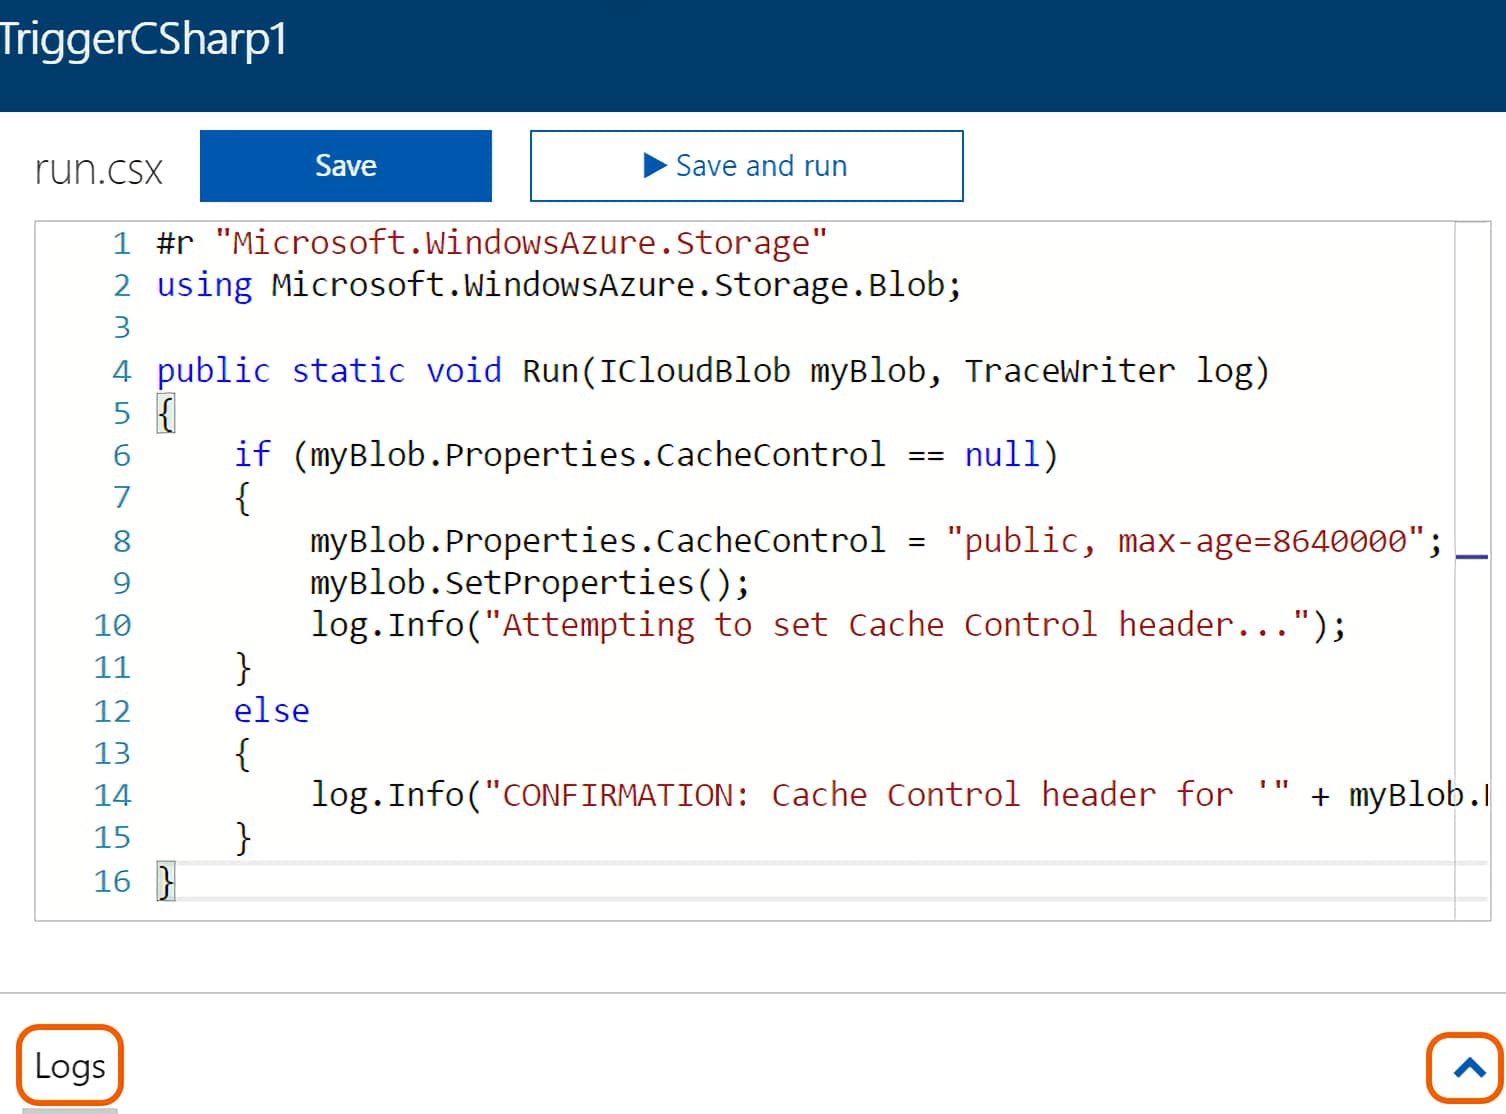
After clicking Create, the run.csx file is opened. Replace the default code with the snippet below:
#r "Microsoft.WindowsAzure.Storage"
using Microsoft.WindowsAzure.Storage.Blob;
public static void Run(ICloudBlob myBlob, TraceWriter log)
{
    if (myBlob.Properties.CacheControl:= null)
    {
      myBlob.Properties.CacheControl: "public, max-age=8640000;
      myBlob.SetProperties();
      log.Info("Attempting to set Cache Control header...");
    }
    else
    {
      log.Info("CONFIRMATION: Cache Control header for '" + myBlob.Name + "' has been set to '" +  myBlob.Properties.CacheControl + "'");
    }
}
Having the max-age equal to 8640000 seconds will set the TTL to 100 days. You can change this to any value above 300. Hit Save.
From now on, whenever you upload a file to the container that the function monitors, the function will trigger, setting the time-to-live of the uploaded file. The function logs can be viewed by clicking on Logs or the ^ next to it.
Set up a CDN endpoint
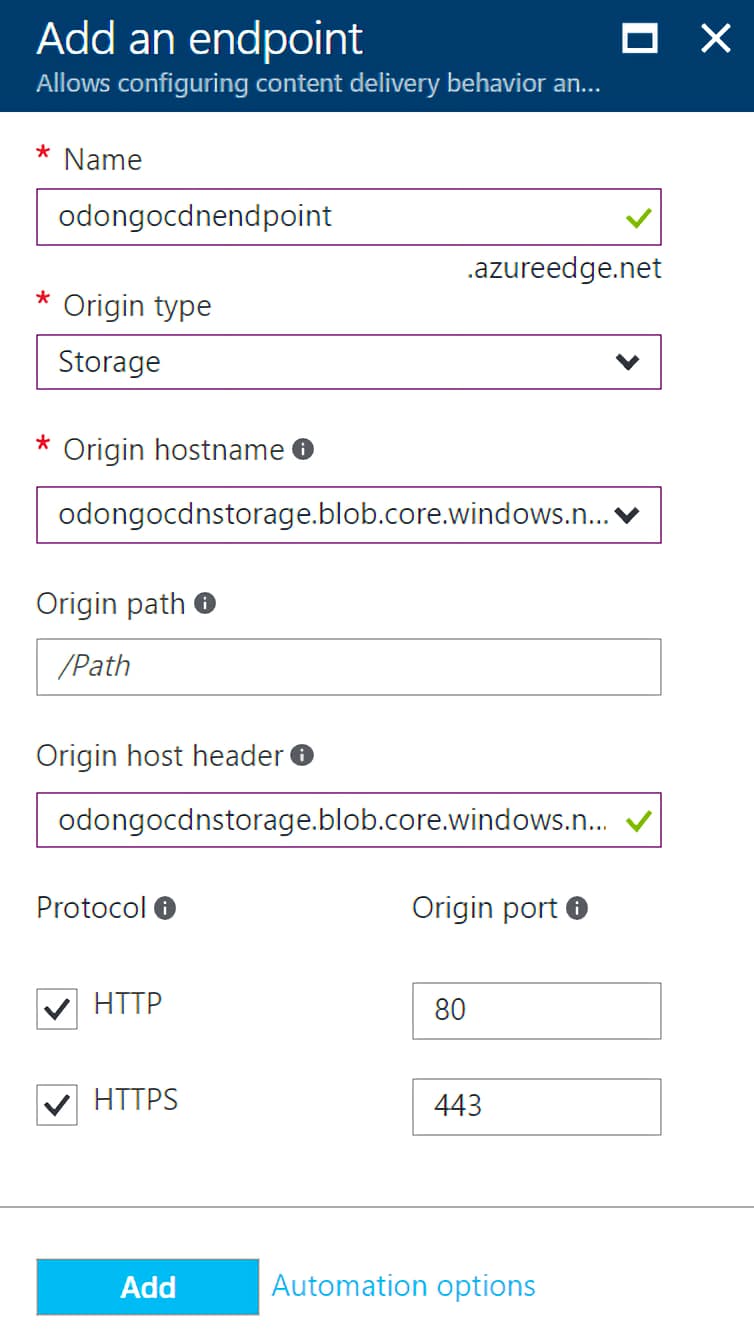
Open up your CDN profile and click on + Endpoint to add a CDN endpoint.
Choose a Name for your endpoint. Set the Origin type to Storage and select the storage account you created as the Origin hostname. After doing this, the Origin host header will fill in automatically.
The Protocols that you decide to permit will depend on your requirements. You may also leave them as they are and change them later.
It may take up to 90 minutes for the endpoint to start functioning as intended. Once it is ready, files in your storage account will be accessible at https://endpoint_name.azureedge.net/container_name/file_name.
Configure your custom domain
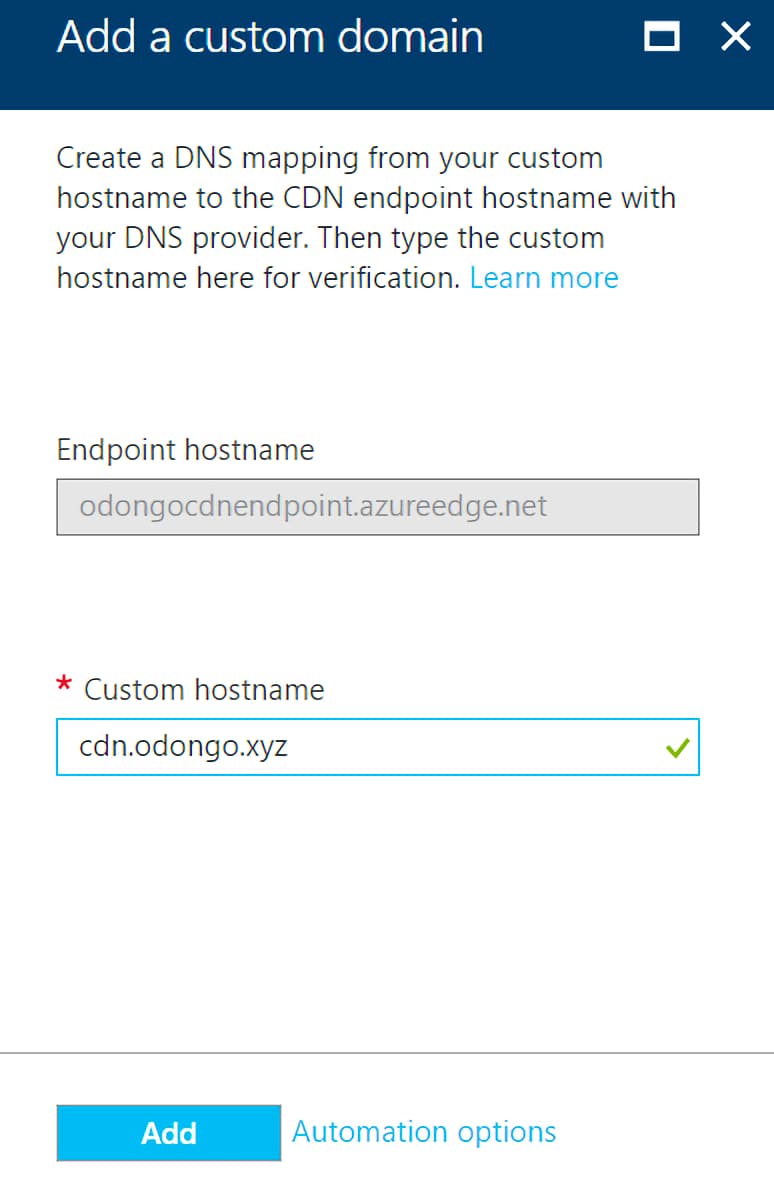
Open the endpoint and click on + Custom domain.
Create a CNAME record for cdn.yoursite.com that points to the value indicated in the Endpoint hostname field. Once the DNS record propagates (this can be checked using DNS Checker), enter cdn.yoursite.com into the Custom hostname field and click Add.
By default, custom HTTPS is disabled. If you would like to enable it click on the custom domain and set Custom domain HTTPS to On. After hitting Apply, an email will be sent to the email address associated with your domain. Verify your ownership of the domain by clicking the link in the email and completing the application.
After setting up your custom domain, your files should be available at cdn.yoursite.com/container_name/file_name. The protocol (HTTP or HTTPS) depends on which protocols you permitted while setting up the endpoint, as well as whether your domain has SSL configured1,2.
Footnotes
-
If you make use of CSP (Content Security Policy) and have strict enough policies, you may need to add any custom subdomain that you created to your list of allowed sources. For instance, if you are planning to use your CDN to serve images you would add a policy similar to the following: img-src: https://cdn.yoursite.com. ↩︎
-
CORS (Cross Origin Resource Sharing) can prove to be an issue while testing your site in a local environment; the browser may block some CDN content. A simple way to get around this is by disabling the restriction on cross origin HTTP requests within the browser. This can be done with the help of a browser extension such as CORS Toggle (Chrome Web Store) or CORS Everywhere (Firefox Add-ons). Both of these extensions add a button to the browser that can be used to toggle CORS. ↩︎
- Sources